It’s that time to say Goodbye to some sweet Spring and Summer products as Stampin’ Up! gets ready for the Fall and Winter mini Catalog. You can get products up to 50% off. Click on the image to the left to download a free PDF file. These prices are only good while supplies last. Make sure to use this host code link when placing your order in my Online Store: UVTHMGEE
Today’s Hump Day Lunch Break featured a SIP (Stamps, Ink and Paper) card and 3 different techniques that are easy and fun to do on your paper crafting projects.
(I also have an added Bonus to share of what happens in My Stamp Studio when filming and doing lives. My Buddy, Cooper loves to be near…see the bottom of the post!)
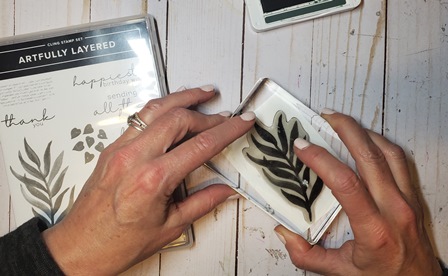
Artfully Layered Stamp Set and Artfully Composed Designer Series Paper
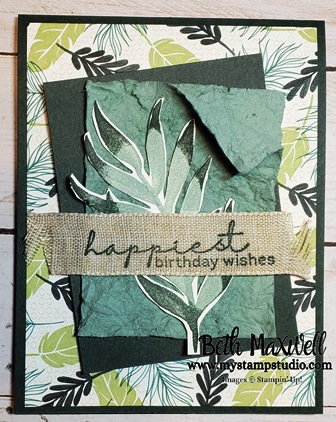
I started with a piece of Evening Evergreen cardstock measuring 4-1/4″ x 11″ scored at 5-1/2″ to form my crad base. I then adhered a piece of the Artfully Composed Designer Series Paper measuring 4″ x 5 1/4″ to the card base. I cut a piece of Evening Evergreen cardstock at 3″ x 4″ and adhered it to the card base at a slight angle using Stampin’ Dimensionals.
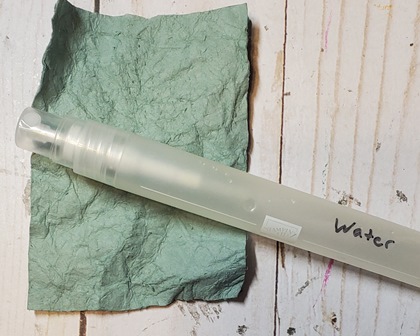
Next I took a piece of Soft Succulent cardstock measuring 3-2/4″ x 3-3/4″ and spritzed water on it using a Stampin’ Spritzer to get the card stock damp but not soaking wet. The I crumbled up the cardstock. This is referred to as the Faux Suede technique. Set it aside to dry. Once dried I peeled apart the cardstock layers one one corner and used Liquid glue to Next I took a piece of Soft Succulent cardstock measuring 3-2/4″ x 3-3/4″ and spritzed water on it using a Stampin’ Spritzer to get the card stock damp but not soaking wet. The I crumbled up the cardstock. This is referred to as the Faux Suede technique. Set it aside to dry. Once dried I peeled apart the cardstock layers one one corner and used Liquid glue to . Pretty cool hey? Once it dried, I used Liquid Glue to adhere on top of the Evening Evergreen rectangle. Pretty cool hey?
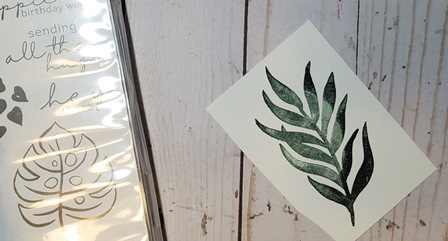
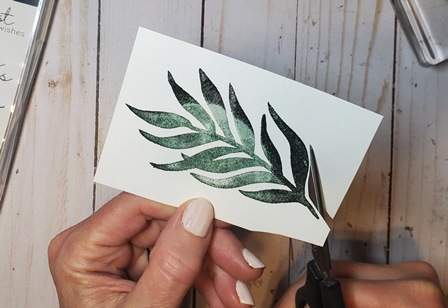
The next technique is called Rock n Roll. I inked the leaf image with Soft Succulent, then I used my Evening Evergreen Ink to rock and roll the stamp pad around the edges of the image so I would just get ink on the tips of the leaves. One tip, it is much easier to do this with a Stampin’ Spot but you can still use the normal size Stamp Pad. Once you have stamped it, fussy cut it out
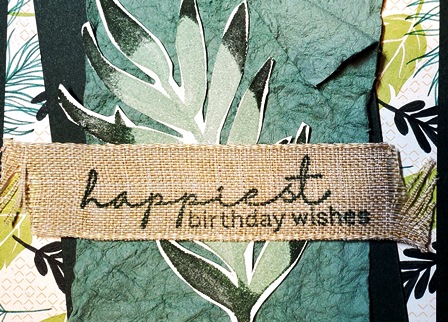
The third technique used on this card was to stamp the “happiest birthday wishes” sentiment using Evening Evergreen ink on to a 4′ piece of Natural Finish Ribbon (new in the 2022-2023 Annual Catalog). The key things here are to use a ribbon that is tightly woven so that the ink will stay on the fabric and not go through it. Also I used Tear and Tape to adhere the ribbon to the front of the card.
All products used today are available in my online store- just click on any of the items below (US Only)
You can watch the Video on YouTube- make sure to leave a comment and subscribe to my YouTube channel. This helps with the Algorithms that will promote my videos to more crafters and in turn I can bring more videos to you!
This is my Buddy, my Pal and our youngest child. Cooper! He loves to be with me- but only when he wants and it always seem to be when I am stamping. (maybe I am stamping a little too much) When it’s playtime or time for cuddles he is all in, but if you are not when he is here the shenanigans begin.
This not so little guy is about 65 pounds of sassy. He will tug at my socks or lick my toes while I am doing my lives to see if he can get my attention. And when he can’t this is what happens under my craft table.
Thanks for stopping by to visit.
Come again soon as I am always posting new things!
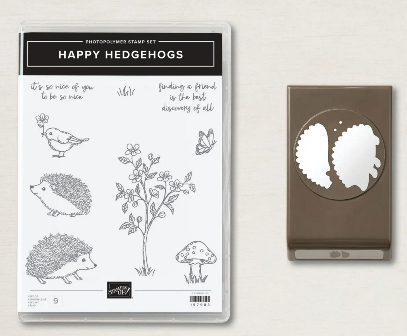
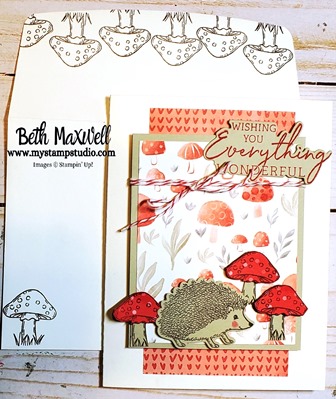
Today’s Lunch break featured the Happy Hedgehogs Bundles and the Charming Sentiments Bundle. The Hedgehogs stamp set is so darn adorable, who could pass up on that cuteness? The Charming sentiment bundle is super cool! We don’t have to fussy cut out sentiments any more. Each sentiment in the stamp set has a coordinating die. WOOOO HOOOOO!
Check out this adorable card. I was inspired by Emma Goddard.
I only used two ink colors for the stamping the rest is all from the Designer Series Paper.
Card Measurements
Thick Basic White: 8-1/2″ x 5- 1/2″
Designer Papers: 5″ x 2-3/4″, 3-1/4″ x 3″
Gray Granite: 4″ x 3 1/4″, scraps for stamping
See below for the complete list of supplies used for the project, click on any of the items to jump to my Online store to be purchased in the US.
Below is the video found on YouTube- Please watch, share and subscribe to my YouTube channel so i can bring even more projects to you.
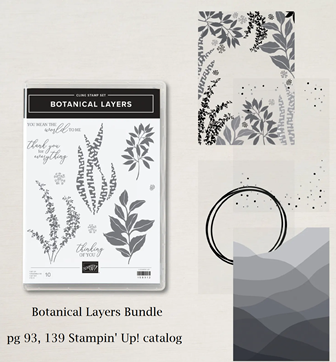
Every Thursday you can find me on Facebook having a Live Class at 6:44 pm central time. I love this time with everyone, it is our social hour and I am always asking for input on the cards we make. This week the class showcased the Botanical Layers Bundle. This is a different bundle than Stampin’ Up! normally has. This is a Stamp Set and a special package of Lovely Layers Vellum You can find it on pages 93 and 139 of the 2022-2023 Stampin’ Up! Annual Catalog.
Did you know that the catalog is not just a catalog, but it is an Idea Book as well and provides lots of inspiration for card and other paper crafting projects. If you don’t have a catalog and don’t have a demonstrator, reach out to me and I would be happy to help you out. you can go to my Contact me page for more information.
Click on the Picture for more information on these products.
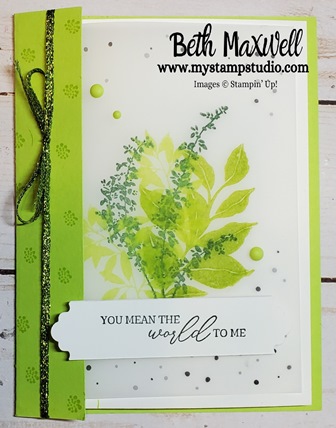
Bright and Light Botanical Layer Card
This card is quick and easy to make and is such a Bright and Cheer card that uses vellum for the Light weight feel, Perfect for summer!
Measurements:
Parakeet Party Cardstock: 5-1/2″ x 5 1/4 ” score at 1″
Basic White Thick Cardstock: 8″ x 5 1/4″ score at 4″ along 8″ side
Lovely Layer Vellum 3-3/4″ x 5″
All the supplies are listed below,
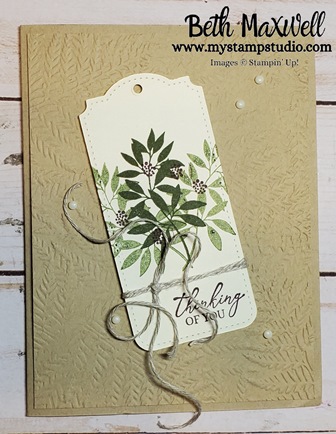
Soothing Botanical Card
Next up, is out Soothing Botanical Card that can be used year round. Very Calming colors, with just a little pop of Blackberry bliss. This is a Easy Peasy, Quick card.
Measurements:
Crumb Cake Cardstock: 8-1/2″ x 5-1/2″, 4: x 5-1/4″
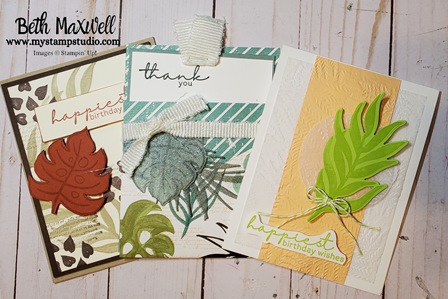
Many times if a stamp set comes with a suite of products or designer paper, we stick with the colors in the papers. I decided to try something a little different today with this very Tropical set. I know, going rogue again. Not really, just playing around with different colors. Let me know what you think. If you want to check out the video, I did a Facebook Live (every Thursday at 644 central) on My Stamp Studio. Here is the link to watch the video on Facebook: ARTFULLY COMPOSED ONLINE CLASS
All the products used to make this card are listed below. This is a SIP card. What is a SIP card? A card made with Stamps, Ink, Paper. No dies or embellishments nothing super fancy-smanchy. Quick and easy but fun to make. Pick 3 colors- grab your stamps, your ink and card stock and you are on your way.
Measurements:
Crumb Cake Cardstock: 8 1/2″ x 5 1/2″ (scored at 4 1/4″)
Early Espresso Cardstock: 5 1/4″ x 4″
Very Vanilla Cardstock: 5″ x 3 3/4″, 5 1/4″ x 4″, 1″ x 3 1/4″
Cajun Craze Cardstock: 3″ 2 1/2″
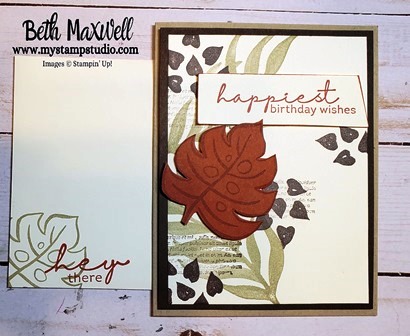
Continuing on, the next card is a Pocket Card, but this time I did use the colors from the Artfully Composed Designer Paper. I did not have to make one substitution as Just Jade is no longer available. I swapped it with Soft Succulent and it turned out great!
This card features a insert that you can easily slide out and stamp and write a greeting on, or you can add a gift card by simply placing a glue dot on the back of the gift card and attaching to the insert. You may want to watch the video for tips on how to create the pocket and flap if you are using directional DSP. I cut the DSP the wrong directions a few times when I first made the card. oops! I did add some of the Shimmery Vellum In color specialty paper which is no longer available, but you can easily swap it out with other cardstock
Measurements:
Artfully Composed DSP: 4″ x 12″ score at 5 1/2″ and 10″
Soft Succulent Cardstock: 5 /4″ x 3 3/4″
Basic White Cardstock: 3 5/8″ x 5 1/8″
15″ of Frayed Ribbon
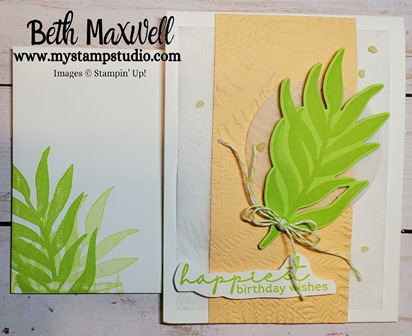
The third card during the Online Class is a fun alternate color combo featuring the new Parakeet Party In Color. It is such a pretty, bright and vibrant color. I also used the new Fern 3d Embossing folder found on page 176 of the 2022-2023 Annual Catalog. The fern embossing folder was used on the Lovely Layers Vellum and Pale Papaya Cardstock for a subtle yet distinctive background. Oh and we cannot forget the envelope! no naked envelopes today. I used the Parakeet Party In color and stamped off the image.
Can you see the amazing Fern embossing on the Lovely Layers Vellum and Pale Papaya cardstock?
Measurements:
Thick Basic White Cardstock: 4 1/4″ x 11 socre at 5 1/2″
Lovely Layers Vellum: 3 3/4″ x 5″
Pale Papaya Cardstock: 2 1/2″ x 5 1/2″
Scrap Basic White for sentiment
Watch the Artfully Composed Online Class Replay on YouTube


Recent Comments