If you’ve ever said, “I want to scrapbook, but I don’t know where to begin”, “I’m not creative”, or “I wish I had time to get caught up on memory keeping”… this event right up your alley!
Stampin’ Up! is hosting its first-ever Virtual Album Retreat, and it’s unlike anything we’ve seen before. Over three days, you’ll be guided step-by-step to create 12 beautiful scrapbook spreads, all while learning fresh techniques and connecting with a community of memory keepers.

Whether you’re brand new to scrapbooking or a seasoned pro, this retreat offers inspiration, education, and connection—all from the comfort of your own home.
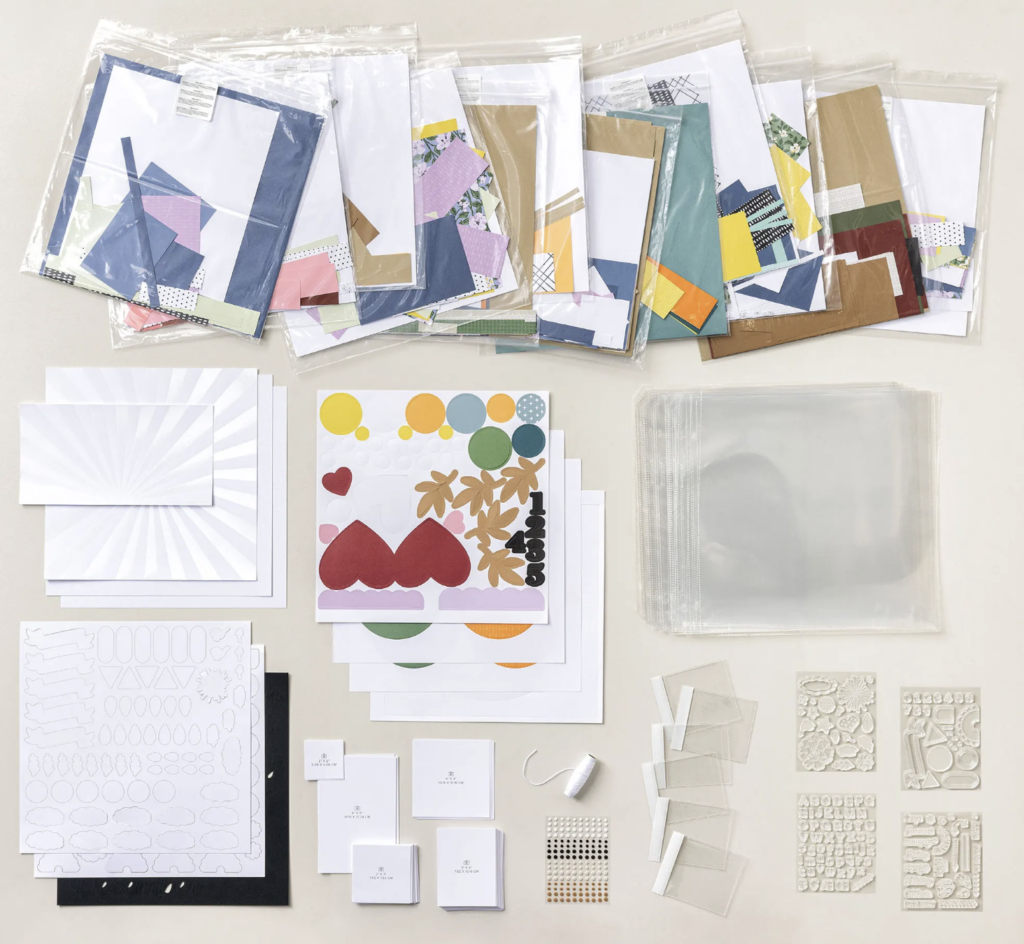
Album Retreat Kit
To make the 12-spread album, you’ll want to purchase the Month by Month Album Retreat 2025 kit.
Everyone who purchases a kit will receive an email in early July with a link to the exclusive Facebook page where the live event will stream.
- Photo Placeholders
- Exclusive stamp sets and die cuts
- Precut Designer Series Paper and Two-Tone Cardstock
- 12″ x 12″ base pages
- Embellishments
- Page protectors and Flip Flaps
Stampin’ Up! only has a limited number of kits, so make sure to order yours ASAP when the ordering period begins on May 28!
There are a few supplies you need to have on hand to complete the pages. CLICK HERE for the list.
CLICK HERE TO ORDER KIT – item number 167338, $250
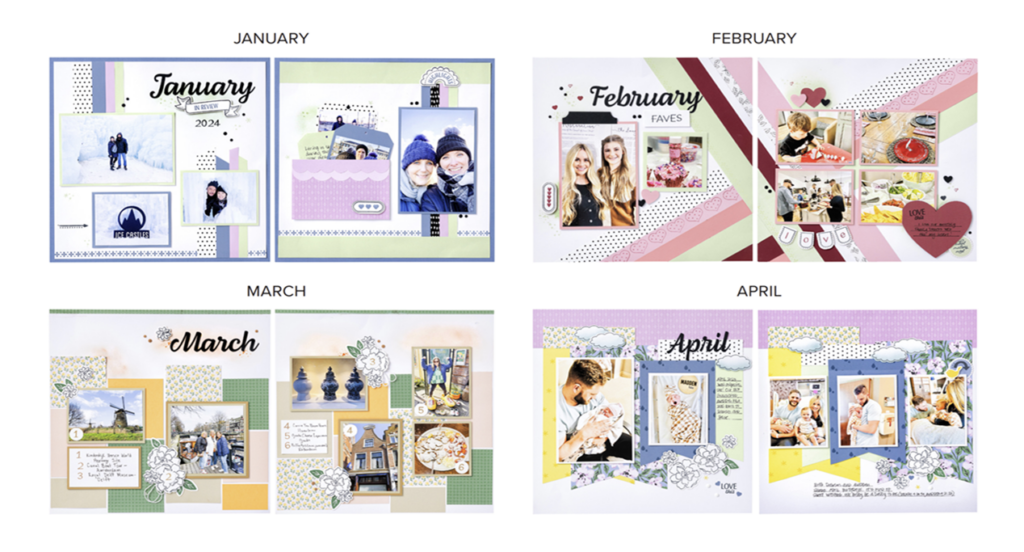
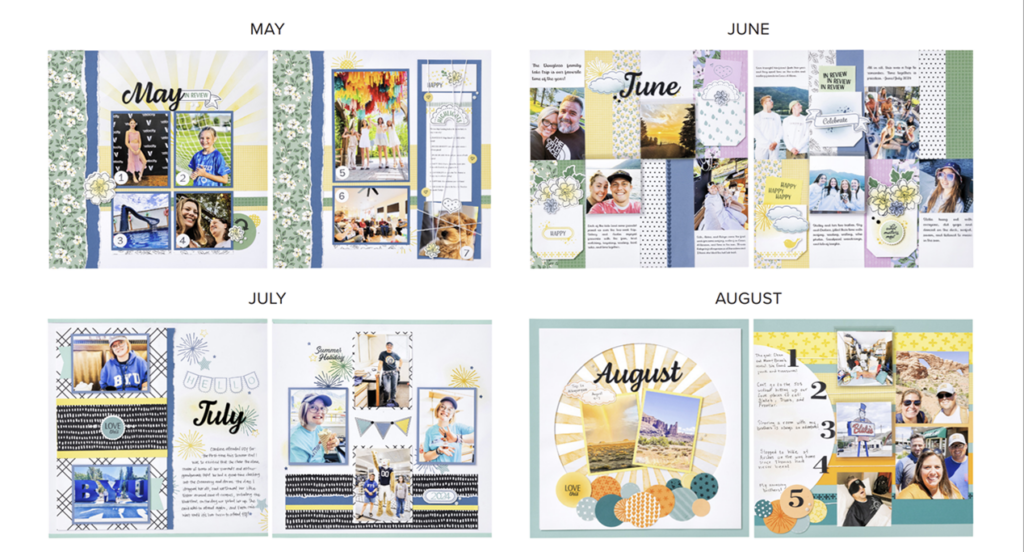
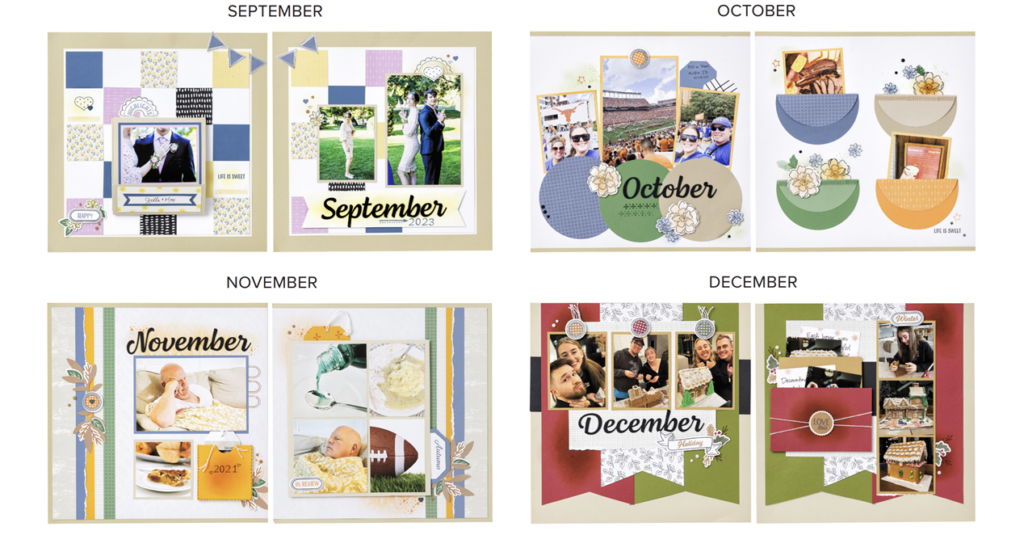
(kit available while supplies last beginning May 28)Make 12 Two page spreads
Make 12 Two Page Spreads
During this live event you’ll make a 12-spread album using the Month by Month Album Retreat 2025 kit. Everyone who purchases this kit will get access to
an exclusive Facebook group where the live event will be held.
Retreat Dates: July 16-18, 2025
The retreat will be held in a private Facebook Group with live sessions from 2:00-10:30 pm (Mountain Time) each day. All the sessions will be available for replay in the Facebook group immediately following the presentations.
There’s no separate registration for the event! All you need to do is purchase the Retreat Kit starting May 28, 2025, and you’re in! Stampin’ Up! will email you all the information to join and participate.


Recent Comments