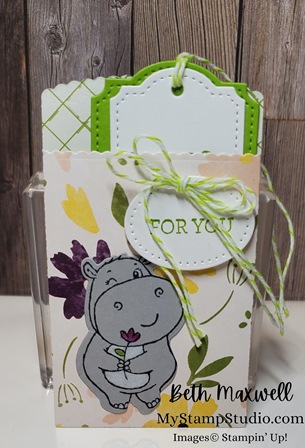
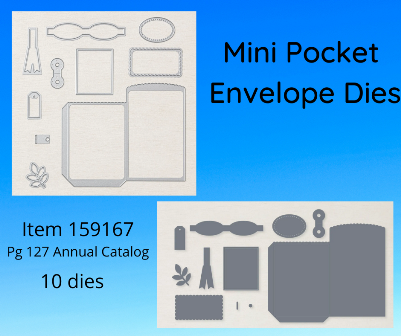
We are changing in up a bit here and making something other than a card. The Mini Pocket Envelope dies are a perfect way to make Gift card holders quick and easy. You can also use this as a little party favor. Watch the video below to find out!
Isn’t this the sweetest little gift card holder and yes a gift card will actually fit in it. This was so fast to make using the Mini Pocket Envelope Dies.
Check out the project video and learn some tips and some fun things along the way!
All Supplies are available while they last in my Online Store- click on any of the products below
This adorable Stamp Set is part of Sale-A-Bration. What is Sale-A-Bration you ask? Its that time of year when Stampin’ Up! spoils their Customers and Demonstrators. You can choose a free Sale-A-Bration products with every $50 or $100 you spend (before tax and Shipping).
Card 1:
This ADORABLE Dancing Hippo just makes this card fun! And it uses the new Black & White Designer Series Paper in the July -December Mini Catalog or as I refer to it- the Holiday Mini!
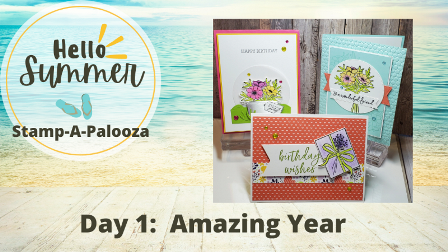
Day 1 of Stamp-A-Palooza features the Amazing Year Stamp set. The cards made in today’s class also feature Stampin’ Up!s Watercolor Pencils. I just love to color, it brings out the kid in me. Oh who am I kidding, everything brings out the kid in me.
The first card in today’s Class is the Amazing Year Birthday Card. The was such a fun card to clod and is a bright and cheery way to say Happy Birthday to someone. The color was done using Watercolor Pencils and a Blender Pen. And to really feature this stamps sets images. I added die cut shapes from the Hippos Dies found in out Sale-A-Bration Catalog. Scroll down to see the cards made and a YouTube video you can watch.
TWO VERY IMPORTANT TIPS
Tip 1: I want to share with you is the about the Black Ink you will use. You NEED to use a solvent based Ink Pad . I always us the Jet Black Stazon whenever I am doing any sort of coloring using Water, Watercolor Pencils, Watercolor Crayons, Chalks, Blender Pens…. The reason being is that the Stazon pad will not smear when you color. If you use a water based Ink, when you apply water, the blender pen, water painters- that water based ink will bleed and make a mess of your projects. Stazon is a Permanent and Fast Drying ink. I highly recommend making sure you clean your stamps right away using a Stazon Cleaner. ClickHERE to see in my Online store
Tip 2: To get the best results when WaterColoring use Fluid 100 Water Color Paper, Shimmery White Cards stock or Basic White Thick cardstock. These are heavier paper and will not break down as quickly as the normal Basic White cardstock. (you can still use it, just be careful not to over blend)
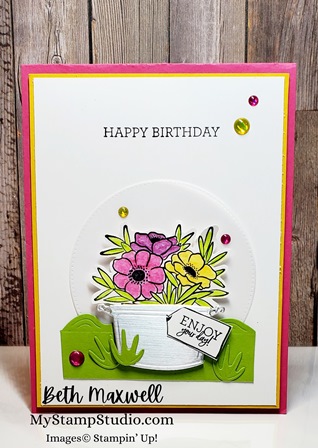
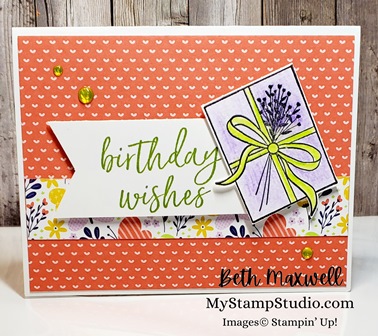
Card 1: Amazing Year Birthday Card
Links to all the supplies used in this card can be found below and are available in my Online store while supplies last. Click the button below to jump over to my Stampin’ Up! Online store or click any of the images below to go to my store for that particular product. When you shop my Store, make sure to put in you Email address and opt in for my newsletter. So you can get information on the next things coming up here at My Stamp Studio.
This super easy card was quick to put together, Thick Basic White Layer, Butterfly Kisses Designer Paper and the image stamped on Fluid 100 Watercolor Paper. Color in it with Watercolor Pencils and a Blender pen or use your Stamp pads along with a blender pen. Try out some new water coloring today. No fancy tools needed for this card. Just Stamps, Ink and Paper.
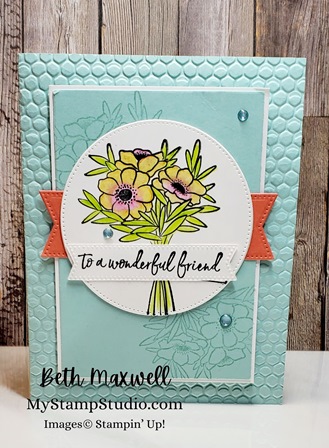
Card 3: Wonderful Friend Card
This sweet card not only features the Amazing Year Stamp Set but also has the Hives 3D embossing folder. I jut love embossing folders, they add that little something. I gave this card a little extra blind by using the Glossy Dots Assortments. It was a pretty quick card to make.
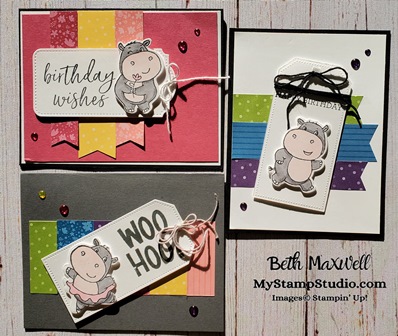
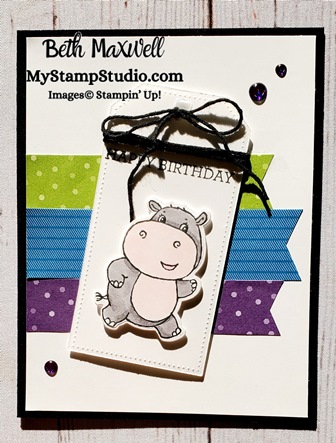
Playing around with the Hippest Hippos Stamp set a free sale-a-bration item when you spend $50 in my online store. I wanted to make some simple cards using scraps of Designer papers I have left over from some other card projects. This set is really adorable I just couldn’t help myself. Don’t wait to get your hands on this adorable stamp set- it is only available while supplies last!
This first card variation I cut strips of the Brights Designer Paper. Place a Tailor Mad Tag with some Black Bakers Twine and of course one of the darling little hippos. I colored the Hippo using Stampin’ Blends popped it up with some dimensionals and added a few glossy dots for some added bling. What do you think? All the supplies are listed below and have links to my Online Store. Did you know this set also has coordinating dies? It sure does. They are also a Sale-a-Bration item. Watch the You Tube video below to see how I put this card together. And don’t forget to subscribe to my YouTube channel- and you may as well click the Notify bell too. this way when you log into to YouTube you will see my latest videos in your feed and be notified when I add more videos!
Today’s Hump Day Lunch Break featured the Let’s Set Sail Stamp Set and coordinating punch along with the Rays of Light Background Stamp. A quick card to show how amazing background stamps can really add depth and focus to a card. Add a few extras and voila a card fit to give!
Measurements
Balmy Blue Cardstock: 8-1/2″ x 5-1/2″, 4″ x 2-1/2″
Basic White: 5″ x 5-1/2″, 4″ x 5-1/4″ (inside of card) and scraps for stamped pieces and punched items
I love using the Stamparatus for stamping large background stamps. Watch the video below for some tips! Also in the video I give some tips on placing your images so you can punch them out without wasting a lot of paper and time. I do also love punches in fact when I first started paper crafting, I bought and entire Alphabet punch set so I could use it for scrapbooking. Boy, have things come a long way since then. I love even the simplest shaped punches like the Cloud punch I used on today’s card.
Grab a coup of Tea or Coffee or whatever your favorite beverage is and watch today’s Live on YouTube below or hop over to my Facebook Page: My Stamp Studio
All Supplies used today can be purchased in the US from my Online Store by clicking the button below or by clicking any of the product images below. Make sure to use the June Host code when placing your order UVTHMGEE
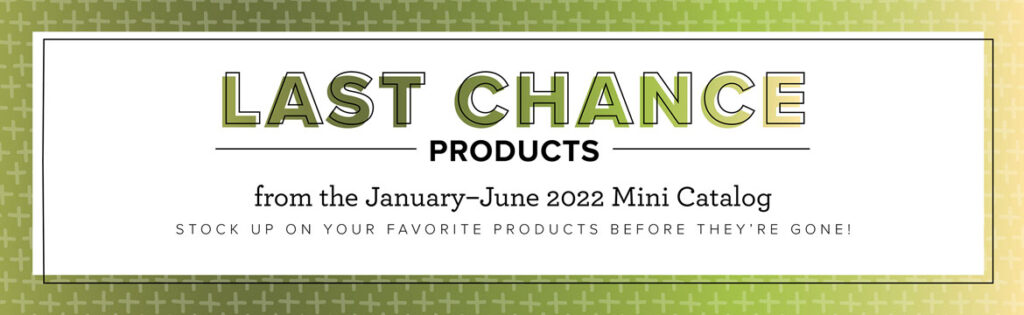
It’s that time to say Goodbye to some sweet Spring and Summer products as Stampin’ Up! gets ready for the Fall and Winter mini Catalog. You can get products up to 50% off. Click on the image to the left to download a free PDF file. These prices are only good while supplies last. Make sure to use this host code link when placing your order in my Online Store: UVTHMGEE


Recent Comments