
The Christmas Card Class Series has kicked off! I just love the Holiday season! While I am not quite ready to say good by to summer, I know that the Holidays will be here before I know if. This year, I want to be well prepared and start my Holiday projects now so come Thanksgiving I am ready to get things mailed. Yes I know that is a well thought out plan- now to make sure I implement it!
It’s funny as a little kid, I was frightened of dogs, but now I just love them. I am a proud doggie mom. yup our little man Cooper (well he is 70 lbs of little) is a joy in our lives. Yes, he can be a handful, but I wouldn’t trade him for the world. My hubby calls him a Momma’s boy. Although he is excited for any family member to walk in the door. And well, he can not hold his licker. so if you love doggie smooches he is the pup to visit. I’ll find some pictures to share later on.
How to Get Your Christmas Scotties Card Kit
You can get this Christmas Card Kit for free when you purchase $35 or more in My Online Store using the Host Code: https://www.stampinup.com?hostcode=YNRN9JCC
The card kit contains all the precut cardstock, designer paper, embellishments, die cut and embossed pieces and envelopes to make 6 cards (2 of each design). A color pdf tutorial with measurements, directions and supplies will be emailed to you the day the kit is shipped out.
This kit does not contain: Stamps, Inks, Adhesive or the punched Scotties, you will need to purchase the bundle or use Stamps and punches you have in your stash. The inks I have used are Real Red, Versamark and Stazon Jet Black.
The Week 1 Class Kit will only be available for orders placed from August 29, 2022- September 6, 2022 and is only available as an exclusive from me with your purchase in my Online store.
BUT WAIT, there’s more. Place a $50 order (before s/h and tax) and I will include a package of Wonderful Snowflakes in your class kit!
Anyways, on to our cards…
here is the class video, feel free to watch or scroll down to the card photos.
Festive Scottie Card
The first card features the Celebrate Everything Designer Paper. But you could use ANY designer paper you have and make it any theme. Did you notice the Wonderful Snowflake accent on the card? It is an iridescent snowflake and can be used on all sorts of cards. In fact, I used them on all 3 cards. On this card I used both the punch and the stamped Scottie image. When I stamped the Scottie on the inside, I used Stazon Jet Black ink. Watch the video for details and tips on using Stazon Ink and cleaning tips.
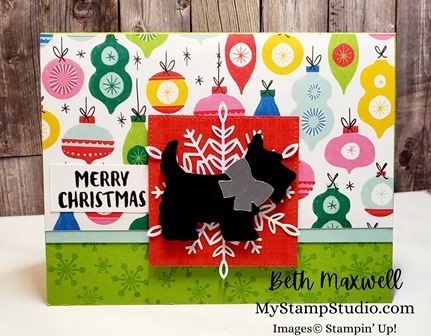
Festive Scottie Card 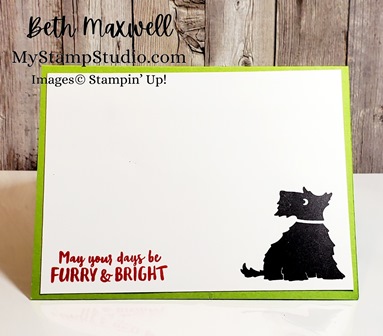
Festive Scottie Card inside
Supplies used (click on picture to go to my Online store)
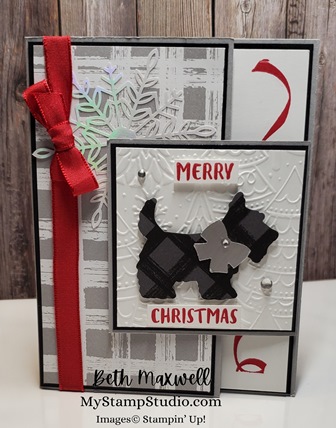
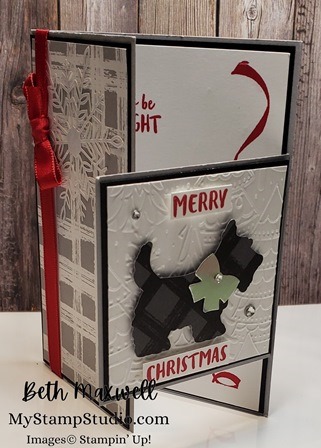
Furry and Bright Holiday Card
Our second card is a bit of a fun fold. Very similar to the Book binding or Matchbook Style cards you may have seen. I was inspired by Lisa McGrew that I has been in a card swap with. I once again used the Celebrate Everything Designer Paper. I also used the Whimsical Woodland 3D embossing folder from the July – December Mini Catalog or as I refer to is as the Holiday Mini Catalog from Stampin’ Up! Try to say Whimsical Woodland 3D embossing folder really fast. It’s almost a tongue twister. I finished off the card with Red Rhinestones and Real Red Ribbon. I also decided I wanted the inside to be different from most cards. Instead of using a piece of Basic White layer, I punched out a Decorative circle, stamped my sentiment in Real Red then added on of the Wonderful Snowflakes. For his collar, I used an Real Red marker to color it in.

Furry And Bright Card 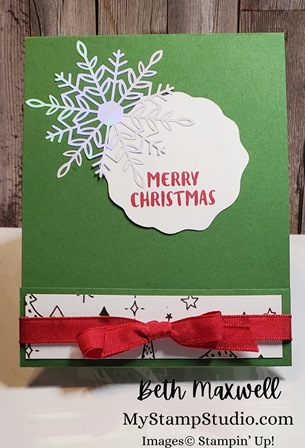
Furry and Bright inside
Supplies used:
Christmas Scottie Fun Flap Card
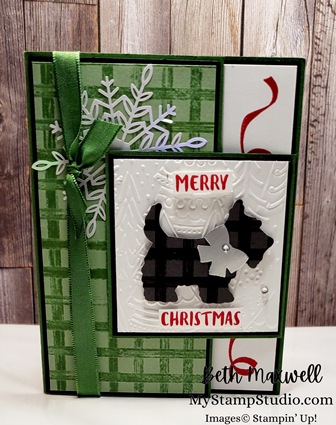
Last but definitely not least… a Fun Flap card. I received this card in a swap as well, but I lost the person’s information that created it so I can not give her credit, I do apologize. I changed it up by adding a Wonderful Snowflake, using the Whimsical Woodland 3d Embossing folder and adding silver foil and Basic Rhinestone jewels. This card features the Gingham Cottage Designer paper that coordinates with the Gingham Cottage Suite found in the July – December Mini Catalog on page 58-59.
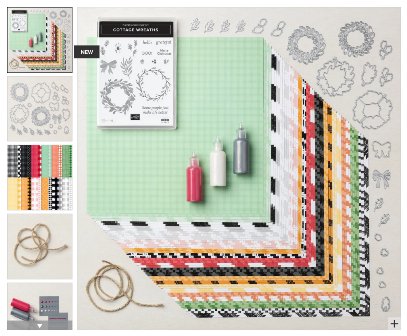
I also tried out using some different colors…check out the Garden Green Version


Leave a Reply