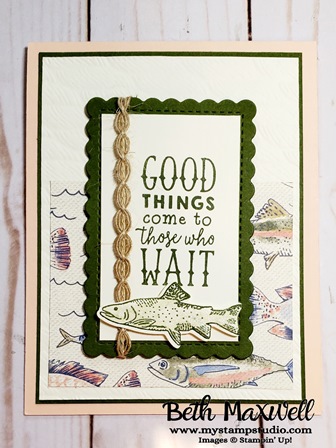
I love the Gone Fishing bundle to make masculine cards. But, there are a lot of women out there that love to fish as well. So in Today’s Hump Day Lunch Break I featured a card that could be used for anyone. I added a bit of Petal Pink to soften up the card and used the Let’s Go Fishing designer paper which is on sale this month!
Measurements
Petal Pink Cardstock: 8-1/2″ x 5-1/2″ scored at 4-1/4″
Mossy Meadow Cardstock; 5-1/8″ c 3-7/8″, 3-7/8″ x 2-3/4″
Very Vanilla Cardstock: 5″ x 3-3/4″, 3-1/4″ x 2″, scrap
Designer Paper: 3-1/2: x 3″
Wavy Trim: 5″
You can watch the replay on YouTube (see below)
All the supplies used in this card are available in My Online Stampin’ Up! store (US Only): https://bit.ly/3N4ZCPo
Today’s Lunch Break Live was actually a dinner break. Because I do work a full time job as well as run my Stampin’ Up! Business, I sometimes need to swap around my schedule. But today’s video is still a great one to see. I know I wanted to feature using Designer Series paper yet make a fun card. It all ties in with the Designer Series Paper Sale you can see all the information on the Specials and Promotions page So I ended up with this one.
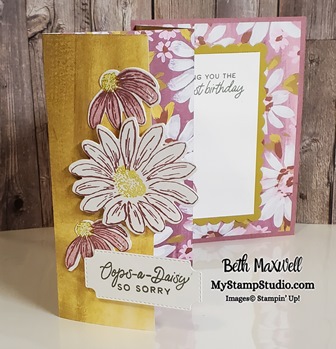
This card features the Fresh as a Daisy Designer Paper and new In Colors. This card layout can be made with any double sided Designer Paper and coordinating Cardstock. See below for a complete list of supplies.
Measurements:
Moody Mauve Cardstock 5-1/2″ x 4-1/4″
Fresh as a Daisy Designer Paper: 5-1/4″ x 12″ (scored along the 12″ side at 2″, 5″, and 8″
Wild Wheat cardstock: 3-3/4″ x 4-1/2″
Basic White Cardstock: 2-3/4″ x 4″ and scraps for stamped images
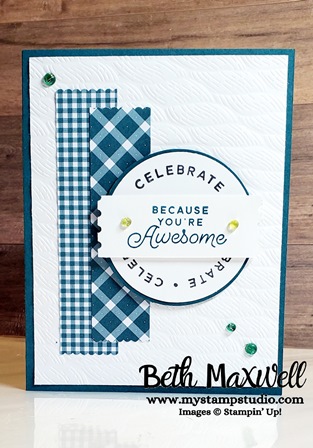
Don’t you just love when you have a card layout you can use over and over again? I know it is super helpful when I need to create many cards quickly. Watch today’s Live Replay on my YouTube channel. And while you are there- subscribe so you don’t miss out on any of the videos I post.
Measurements
Card Base: 5-1/2″ x 8-1/2″ (scored at 4-1/4″
Card layer: 4″ x 5-1/4″
Designer Paper: 2 strips measuring 1: x 4-1/2, 1″ x 4″
scrap for circle punch
All the supplies I used in today’s 3 cards are listed below, you can click on any of the images to jump right to my Online Store
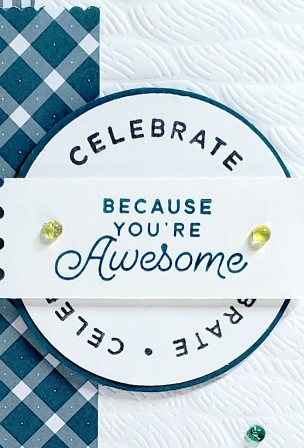
This card features a brand new stamp set in the Stampin’ Up! Annual Catalog. It is called Crafting with You. It even has dies that coordinate with the stamp set. In today’s card I just used the stamp set. Oooh but I could not resist using the Twisted Rope 3D Embossing folder. I couldn’t help it, it reminded me of yarn. Below is a close up of another card made today using the Circle Sayings Bundle. You can really see the embossing
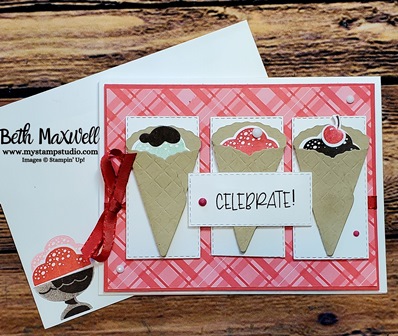
Who says you can’t have your dessert first? As my Grandmother got older she would tell me to enjoy dessert first cuz that is the best part of the meal. So Today I decided to Share a Milkshake before running down for lunch. Each Wednesday I bring a quick card to you while you enjoy your lunch.
Share a Milkshake card from March 15, 2023 Hump Day Lunch Break
You can check out the whole step by step process in my YouTube Video below
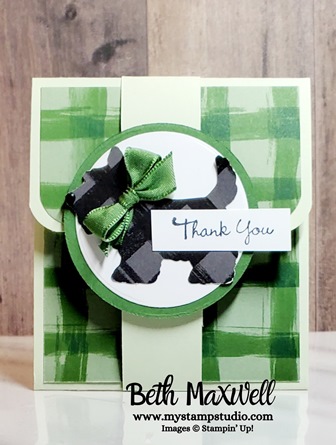
Hello and welcome to our Hump Day Lunch Break. Today we made this adorable quick and easy gift card holder using scraps of designer paper, punches and dies. But you can use anything in your stash. These gift card holders are so quick and easy to make- they are great for those last minute gifts you need. I love this gift card holder, I have used this so many times to make multiple ones quickly and always have these on hand. Many times, I leave the sentiment off unitl I know what I need it for. I just go grab a sentiment set, stamp on a scrap piece of white cardstock and well-la card to go done!
The measurements for this holder are
Soft Sea foam Cardstock- 3-1/2″ x 8-1/2″ Score along 8-1/2″ side at 2″ and 6″ a 1″ x 8-1/2″ strip for belly band
Designer Paper: 3-1/4″ x 2-1/4″, 3 -1/4″x 1-3/4″
White cardstock: 2″ x 3-1/4″, scrap for circle and sentiment
Garden Green Cardstock: 2-1/2″ x2-1/2″ for circle
Below is the YouTube video replay form the Facebook Live (which I do each Wednesday at 12:15 pm central). you can find me onfacebook (https://www.facebook.com/bethmaxwellmystampstudio/) and join theMy Stamp Studio Group (https://www.facebook.com/groups/1353770698308128/)
Supplies used for this gift card holder
click on any of the images to hop over to my Online Stampin’ Up! store.
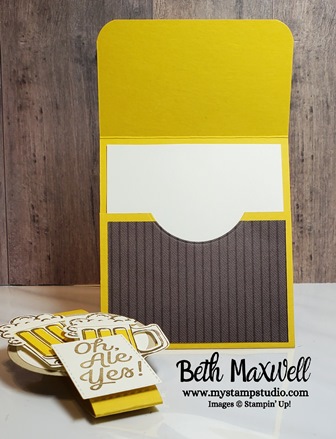
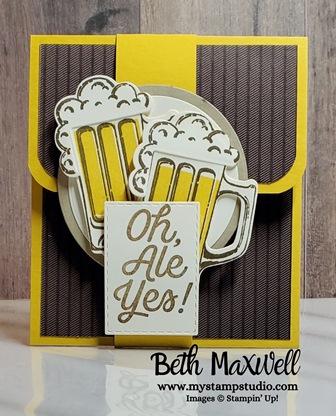
Here is another gift card holder using the Brewed for You Stamp set and dies. I combined it with Crushed Curry Cardstock and Neutrals 6″x 6″ designer series paper.
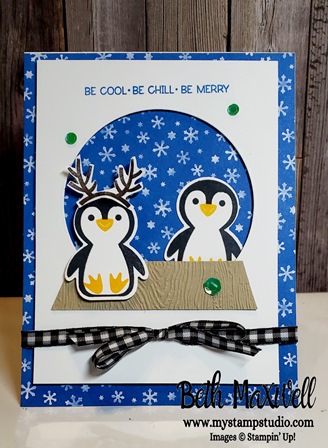
Hello all and welcome to the Hump Day Lunch Break live! Today we used the Penguin Place Stamp set and coordinating Penguin Builder Punch. The Punch will be on sale during out Last Chance Sale…check out the pdf file below for all the specials form the July – December Mini catalog that will be on sale and retiring. Don’t miss out on your favorite things!!!!!
You can shop my online store to purchase products that were used in today’s video (while supplies last). Click on any of the images below.
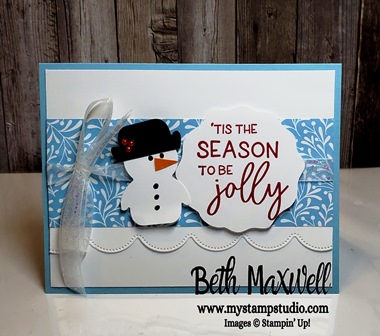
These penguins are soooooo sweet, I just love this set and the punch too. Did you know that you can mke a snowman from it? Check this card out.


Recent Comments